Step 1: Setup Game folders
Before you start working with the Editor you should set the Game-Path of the C&C Edition you want to edit by pressing the “Games” Button. There you can also add any Custom Mod Folder by pressing “Add custom Mod”
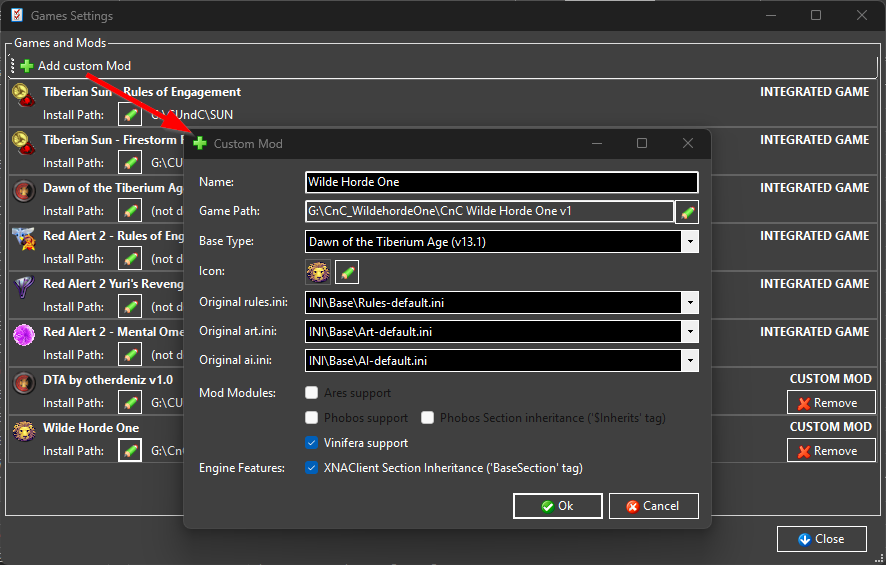
If you add a custom Mod, the Editor takes a Snapshot of the original ini-Files. More info about Original files handling.
Step 2: Locate the Game Files
- Find your C&C installation folder.
- Example paths:
C:\Westwood\Tiberian Sun\- Or the folder where your mod is installed (if using a standalone mod).
- Example paths:
- Locate the following files:
rules.ini– controls game logic, unit stats, weapons, building behavior, etc.art.ini– handles graphical definitions like SHP animations, voxel models, and effects.ai.ini– handles the artificial intelligence.
If these files don’t exist, the game might be reading from a .mix archive. You can create a new file in the C&C Rules Editor or you can extract them using tools like XCC Mixer.
Step 3: Understand File Structure Basics
rules.ini Sections:
[General]– Game-wide settings.[VehicleTypes]– List of vehicles (same pattern for infantry/buildings).[GDI],[Nod]– Faction-specific settings.[XXX]– Individual unit/structure definitions.
Example unit:
[GDIAPC]
Name=APC
Image=APC
Armor=light
Primary=Minigun
Cost=600
art.ini Sections:
[XXX]– Matches theImage=tag fromrules.ini.- Defines graphical settings like voxel files, animations, shadows.
Example:
[APC]
Voxel=yes
Remapable=yes
Step 4: Save and Test
- Save the INI files in the game-folder
- Launch the game.
- Play a skirmish or custom mission to test your changes.
Original files handling
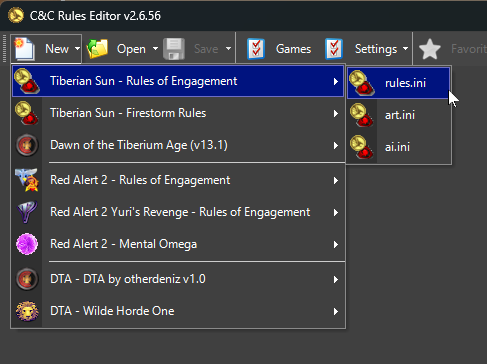
The Rules Editor always shows the “original” values in a separate column. It takes these original values from the original file (you can see the path to the original file under the menu bar of the Rules Editor)